

A practical vegetable garden series
From a tiny seed to generous handfuls of dark, delicious leaves.
|
GROW WITH US You do not need a perfect vegetable plot. A few well-spaced plants, steady summer watering and regular picking can give you many useful meals. |
Written for home gardeners in Hungary
CHAPTER WELCOME
Your black kale season starts here
This book follows the whole journey: seed → seedling → garden → care → harvest → kitchen → next season.
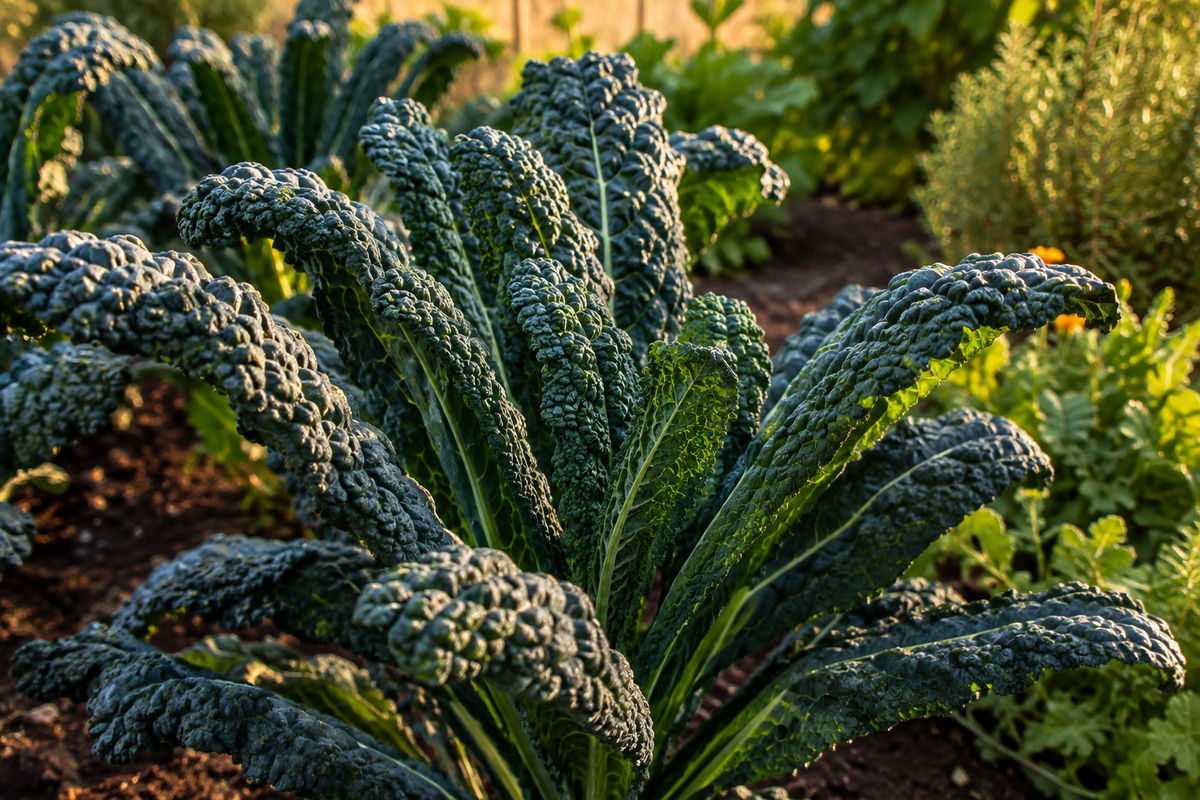
Black palm kale makes a handsome plant and a practical vegetable. Its long, dark, crinkled leaves rise around an upright stem, giving it the look of a little palm tree. You may see it sold as black leaf kale, Tuscan kale, cavolo nero or Nero di Toscana.
We grow it for leaves, not a cabbage head. In Hungary, the main challenge is often summer heat and dryness; autumn brings cooler weather and a rewarding harvest. This book follows the whole journey, including what to do when caterpillars arrive or winter turns severe.
Our Hungarian calendar
|
March–April |
Sow in modules for an earlier crop. |
|
April–June |
Sow outdoors or plant hardened seedlings. |
|
May–July |
Establish plants; protect from pests and drought. |
|
Summer |
Pick lightly while growth is strong. |
|
September–November |
Enjoy the main cool-weather harvest. |
|
Winter–spring |
Pick cautiously; protect in severe weather. |
|
WHAT I WOULD DO For an autumn crop, I would sow a small batch in late spring or early summer, establish it well before the worst heat and plan for regular watering. A later batch is useful only if there is time to grow before winter. |
The rule for this series: dates guide us, but the plant and the weather make the final decision.
CHAPTER 1
Meet the Black Palm Kale
Let’s get to know the leafy plant that can keep your kitchen supplied long after the tomatoes finish.
Black palm kale is a leafy brassica, in the same species as cabbage, broccoli and cauliflower: Brassica oleracea. The traditional Tuscan forms make long, narrow, puckered leaves rather than a tight head. As you pick the lower leaves, the bare stem becomes more visible and the remaining crown gives the plant its palm-like outline.
Leaves rather than a head
|
Baby-leaf crop |
Sow more closely and cut young leaves for salads. Small plants use less space, but need repeated sowings for a long supply. |
|
Mature-leaf crop |
Give each plant room to build an upright stem. Pick outer leaves over many weeks, keeping the growing tip intact. |
Understand the plant before you choose
· The leaves are the crop. You do not wait for a cabbage head to form or pull the plant up for the first harvest.
· Young leaves are tender enough for salads; larger leaves are useful for soup, pasta, stews and sautéing.
· Cool weather suits it. Summer-grown plants can supply leaves, but autumn conditions often improve their texture and flavour.
· Established plants tolerate frost, although exposed leaves can be damaged by severe cold and repeated freezing.
· Traditional black kale is normally biennial: it grows leaves first and usually flowers after winter as the next spring arrives.
· This is an edible vegetable with ornamental appeal. A few plants can look lovely among flowers, provided they receive suitable care.
|
GOOD TO KNOW Cavolo nero, black leaf kale, black palm kale and Tuscan kale usually refer to the same distinctive style. The packet may also give a specific cultivar name, such as Nero di Toscana. |
CHAPTER 2
Choose Your Black Palm Kale
The familiar names describe the Tuscan style of kale. Check the packet for the specific variety, plant size and sowing advice.
Ask yourself five questions
1. Do I want mature cooking leaves, tender baby leaves or a little of both?
2. Will it grow in a bed, a raised bed or a large pot?
3. Can I water through hot Hungarian summer weather, especially while plants establish?
4. Do I have insect mesh and time to check for eggs and caterpillars?
5. Would a spring sowing or a later sowing for autumn fit my garden better?
A beginner-friendly first planting
|
3–6 mature plants |
A manageable first group for learning regular leaf harvesting. |
|
1 small baby-leaf sowing |
For quicker tender leaves while the larger plants develop. |
|
1 suitable insect cover |
To help keep cabbage butterflies and other pests away. |
|
1 accessible growing spot |
Put the plants where checking and picking become an easy habit. |
|
A COMMON MISTAKE Treating black kale like a heading cabbage. It does not form a tight head, and waiting for one means missing months of useful leaves. |
|
TRY THIS Label two small sowings a few weeks apart. Comparing their performance helps you find the best timing for your own garden without growing far more kale than you need. |
CHAPTER 3
Let’s Sow
The small round seeds are straightforward to sow. Give the seedlings light, steady moisture and space to develop.
When to sow in Hungary
For a first crop, sow in modules in March or April in a bright, sheltered place. Outdoors, April to June is a practical window once the soil is workable; cold springs may delay it. An early-summer sowing can provide strong plants for autumn. July sowing is possible for an autumn crop in favourable conditions, but allow time for plants to grow before days shorten.
What you need
· Fresh seed of a black palm kale variety
· A module tray or small pots with drainage holes
· Fine seed-starting compost and a label
· A bright, moderately warm place, rather than a hot dark shelf
· A watering can with a fine rose and protection from slugs
Sowing, step by step
1. Fill modules with moist compost and firm it gently, leaving a little room below the rim.
2. Sow one or two seeds per cell about 1 cm deep. Cover lightly and label with variety and date.
3. Water gently. Keep the compost moist, but let extra water drain away.
4. A moderate temperature of roughly 15–20°C is useful. Seedlings commonly appear within about a week, but cooler conditions slow them down.
5. Move emerging seedlings into strong light. If both seeds germinate, snip off the weaker seedling so one plant remains in each cell.
|
DON’T PANIC Seeds germinate more slowly in cool compost. Keep the seedbed lightly moist and give it time; extra heat and constant soaking are rarely the best answer. |
|
A COMMON MISTAKE Sowing a thick patch and never thinning it. Crowded seedlings stretch and compete; one healthy plant per module is easier to handle. |
CHAPTER 4
Seedling School
The goal is a sturdy little kale plant with healthy roots and a few true leaves.
Light first
After germination, light matters more than extra heat. Seedlings on a warm, dim windowsill quickly become thin and stretched. A bright cool room, cold frame or sheltered greenhouse can work well; protect tiny plants from hard frost and ventilate covered spaces on sunny days.
Potting on
If the roots fill the cell before the bed is ready, move the seedling into a small individual pot. Hold it by a leaf rather than crushing its stem. Keep the root ball together and use fresh compost. Do not leave it root-bound for weeks while waiting for a spare patch of soil.
Water without babying them
Check the compost rather than watering automatically. Water when the surface begins to dry, then allow drainage. A tray left standing in water encourages weak roots; a tiny cell that dries completely can damage a seedling in one hot afternoon.
Feeding
Fresh potting compost usually feeds young plants for a while. If seedlings remain in pots long enough to need feeding, use a dilute balanced feed according to the label. A pale plant may also be cold, waterlogged or root-bound, so check its conditions first.
|
WHAT I WOULD DO I would choose a short, sturdy seedling with several true leaves and healthy roots. A very tall seedling is not necessarily more advanced; it may simply have lacked light. |
|
DON’T PANIC A little transplant pause is normal. Keep the roots moist, shelter the plant from harsh conditions and look for healthy new growth before changing the feeding routine. |
CHAPTER 5
Ready for the Real World
Kale is cold-tolerant, but a plant raised indoors still needs a gradual introduction to outdoor weather.
Hardening off: about 7–10 days
1. Start with a few hours in a sheltered outdoor position on a mild day.
2. Protect from harsh midday sun and strong wind at first.
3. Increase the time outside and the amount of direct sunlight gradually.
4. Bring tender indoor-grown seedlings under cover if a sharp frost is forecast.
5. Keep the root ball moist during this transition, especially when spring weather suddenly turns warm.
When can it stay outside in Hungary?
Unlike tomatoes and bitter gourd, hardened kale need not wait for fully summer-like nights. Spring planting is often possible in April or May when soil is workable and conditions are suitable. Do not put soft indoor seedlings straight into a frosty spell: give them time to adapt, and use temporary fleece if needed.
Near Győr, wind and cool spring nights can slow establishment; a protected Budapest garden may warm earlier. On a hot southern site, early-summer planting needs particularly careful watering. The best day is a mild or overcast one, followed by weather that gives the roots time to settle.
|
A COMMON MISTAKE Assuming frost tolerance means an indoor seedling needs no hardening off. Sudden wind and strong sun can damage kale even when the temperature is mild. |
|
GOOD TO KNOW For kale, a mild cloudy planting day is often more useful than a hot sunny one. Spring frost tolerance does not protect a new transplant from drying roots. |
CHAPTER 6
Give Them a Good Home
A well-prepared bed and sensible spacing give you larger leaves and a longer useful harvest.
The right place
Choose fertile, well-drained soil in sun or light shade. Some afternoon shade can be helpful during fierce summer heat, although deep shade produces weak growth. Add mature compost before planting. Rotate kale with its brassica relatives, avoiding the same patch for several years where possible; do not treat broccoli followed by kale as a different crop family.
Spacing
For mature black palm kale, allow roughly 45–60 cm between plants and about 60 cm between rows, adjusting to the variety. Baby-leaf sowings can be closer because they are harvested small. Mature plants squeezed together make smaller leaves, shelter pests and are difficult to inspect.
Planting day
1. Water the seedlings beforehand so the root balls are evenly moist.
2. Make a hole large enough to hold the roots comfortably, without folding them.
3. Set each plant at its previous growing depth, firm gently around the roots and water well.
4. Cover with suitable insect mesh straight away, checking that no pests are trapped underneath.
5. Mulch around settled plants to conserve moisture, leaving a small clear space around each stem.
Growing in pots
One mature plant needs a generous container, around 20–30 litres or more, with good drainage. Use fresh potting mix, leave room for watering and expect pots to dry faster than a bed. Several small containers crowded with tall plants are harder to manage than one properly sized pot.
|
TRY THIS Plan the bed so you can reach the back of every plant. Checking leaf undersides is much easier when you are not stretching over another row. |
CHAPTER 7
Water, Feed & Keep It Growing
A leafy harvest depends on steady growth. Summer care is mostly about moisture, roots and protecting the leaves.
Watering
Water thoroughly at the base when the root zone begins to dry. Do not rely on a daily surface sprinkle. During Hungarian heatwaves, inspect pots every day and check soil beneath the mulch in beds. Wilting, dry soil and tough new leaves are reasons to review watering, not simply add fertiliser.
Mulch
A layer of mature compost, straw or another suitable organic mulch reduces evaporation and weed competition. Apply it to moist soil, not over a bone-dry bed. Keep it away from the stems and watch for slugs hiding underneath.
Feeding
Kale benefits from fertile soil and may need supplementary feeding during a long picking season. Use a balanced vegetable feed at the labelled rate if growth slows or soil fertility is low. Avoid repeated heavy feeding without a reason; good moisture and healthy roots are equally important.
Support and leaf care
Tall plants can rock in strong wind, especially after repeated lower-leaf harvesting. Firm loose soil gently and add a small stake if needed, using a soft tie. Remove yellow or badly damaged leaves. Keep the central growing tip and enough healthy foliage so the plant can continue making new leaves.
|
WHAT I WOULD DO I would water deeply, mulch moist soil, inspect the leaf undersides and take modest harvests. Keeping the central crown healthy matters more than picking every available leaf. |
CHAPTER 8
Leaves, Pests & “What Is That?”
Look closely and regularly. A small pest problem is easier to manage before the best leaves turn into lace.
Why are there holes in the leaves?
Cabbage white caterpillars are frequent visitors to brassicas. Check both leaf surfaces, especially the undersides, for eggs and small caterpillars. Fine insect mesh works well when securely fitted and checked regularly. Slugs often attack seedlings, while flea beetles make small round holes; different damage patterns need different responses.
The beginner’s trouble guide
|
Large irregular leaf holes |
Look for caterpillars and their droppings. Inspect leaf undersides; hand-remove small infestations and check insect covers. |
|
Tiny round holes |
Flea beetles often damage young brassicas. Protect seedlings with suitable fine mesh and support steady growth. |
|
Grey clusters on leaves |
Often cabbage aphids. Check sheltered folds; remove badly infested leaves and rinse small colonies from sound foliage. |
|
Yellowing and slow growth |
Check watering, roots and fertility. Swollen, distorted roots may indicate clubroot; avoid spreading contaminated soil. |
|
Plants wilt despite wet soil |
Root damage, waterlogging or disease may be involved. Improve drainage and investigate before adding more water. |
|
DON’T PANIC A few holes do not ruin a whole crop. Wash and inspect sound leaves carefully, remove insects, and focus on protecting new growth. |
|
A COMMON MISTAKE Putting insect mesh over plants already carrying eggs or caterpillars. Inspect first, secure the edges and check underneath regularly. |
CHAPTER 9
Can I Pick It Yet?
This is the moment you planted for: the first useful handful of dark leaves.
What “ready” looks like
Pick when the plant is well established and has several healthy leaves, rather than following a date alone. Choose outer leaves while they are still fresh and flexible. Depending on sowing time and weather, small leaves may be usable in several weeks; a dependable mature-leaf harvest often takes around two to three months. Leave the young central leaves and growing tip intact.
Harvest by purpose
|
Salad today |
Pick the youngest usable outer leaves; wash thoroughly and taste for tenderness. |
|
Soup or pasta |
Choose sound medium leaves and remove tough central ribs. |
|
A bigger batch |
Take a few leaves from several plants, leaving enough healthy foliage on each. |
|
After frost |
Wait for frozen leaves to thaw naturally before picking; discard damaged or rotting tissue. |
How often should I pick?
Visit the plants once or twice a week during active growth. Take a few usable outer leaves from each plant, rather than stripping one plant bare. Harvest is slower in short winter days; reduce picking then and leave enough foliage to sustain the plant. Never tear leaves from a hard-frozen plant: wait until they thaw.
|
READY TO HARVEST? A plant with several strong leaves can spare a modest picking. Start with outer leaves, leave the central growing tip, and let the plant keep its leafy crown. Small, regular harvests are the aim. |
|
TRY THIS Cook one small handful this week and note how many leaves you used. That tells you far more about the number of plants your household needs than a seed catalogue can. |
CHAPTER 10
From the Garden to the Kitchen
A few freshly picked leaves can turn a simple meal into something you look forward to.
The first rule: match age to cooking
Wash leaves thoroughly, including the folds where soil or insects can hide. Tender young leaves need little preparation; large leaves often have a firm central rib. Hold the rib and strip the leaf blade away, then chop it. Cook thick ribs separately or use them in stock if they are sound. Older leaves usually benefit from longer cooking.
Match the leaf to the dish
· Small tender leaves: salads, lightly wilted greens or a quick omelette.
· Medium leaves: pasta, stir-fries, sautéed greens and warm grain bowls.
· Larger leaves: bean soups, stews and slow-cooked dishes; remove tough ribs.
· A mixed handful: slice finely and add to soup near the end, tasting for tenderness.
|
FROM THE KITCHEN Quick kale and beans: strip the ribs from medium leaves, slice the greens and sauté with garlic and olive oil. Add cooked white beans and a splash of water, then simmer until tender. Finish with lemon and seasoning. |
Storing fresh black kale
Harvest in the cool part of the day and refrigerate promptly. Keep leaves in a bag or covered container with a little humidity, without leaving them dripping wet. Use within several days. For a salad, young leaves can be massaged briefly with a little oil to soften their texture.
When you have more than you can use
Blanch prepared leaves briefly, cool them quickly in cold water, drain well and freeze in meal-size portions. Frozen kale is most useful in cooked dishes. You can also batch-cook bean soup or sautéed greens for the freezer. Leave some leaves on the plant so the next harvest has time to grow.
CHAPTER 11
Next Season Starts Now
Kale teaches you to plan beyond summer: a well-established autumn plant is a useful winter resource.
Keep a tiny garden record
· Variety name and where it grew
· Sowing and planting dates
· When the first worthwhile leaf harvest began
· Leaf tenderness and the dishes you enjoyed most
· Which pests appeared and whether insect mesh helped
· How the plants handled summer heat and winter cold
· How much space, water and feeding they needed
Winter, flowering and seed saving
Leave healthy, established plants outdoors if you want to try winter picking, but do not assume every Hungarian winter will spare them. A sheltered bed and temporary fleece can reduce exposure; severe frost, wind and wet soil may still damage leaves or plants. In spring, overwintered black kale usually begins flowering. That is its normal biennial cycle, and the leaf crop eventually declines.
1. For a straightforward next season, buy fresh seed and raise a new batch of young plants.
2. If saving seed, choose several healthy open-pollinated plants and allow them to flower in their second season.
3. Remember that other flowering Brassica oleracea crops can cross with kale. Learn suitable isolation before expecting true-to-type seed.
4. Let pods mature and begin drying, then collect before they split and scatter their seeds. Finish drying in a sheltered, airy place.
5. Clean, label and store fully dry seed in a cool, dry place. Seed saving needs more planning than simply leaving one plant to flower.
|
GOOD TO KNOW Black kale can cross with other flowering crops of the same species, including cabbage, broccoli and cauliflower. One isolated-looking plant is not automatically a reliable source of true-to-type seed. |
|
WHAT I WOULD DO For my next crop, I would first choose the sowing date and pest cover that worked best. Fresh seed and a small, well-managed planting are a straightforward way to begin again. |
COME GROW WITH ME
BLACK PALM KALE CHEAT SHEET
The page to come back to when you have soil on your hands and no time to reread the whole book.
|
SOW |
March–June is a useful main window |
About 1 cm deep; modules or outdoors |
|
GERMINATE |
Moderate warmth; moist compost |
Strong light after emergence |
|
PLANT OUT |
Hardened seedlings in suitable weather |
Do not wait for tomato-like warmth |
|
POSITION |
Sun or light shade; fertile soil |
Good drainage; summer moisture |
|
SPACE |
About 45–60 cm for mature plants |
Allow access; baby-leaf crops closer |
|
Water |
Deeply at the roots. Check pots and new plantings often during heatwaves. |
|
Feed |
Prepare fertile soil; feed moderately if growth and soil conditions justify it. |
|
Protect |
Use insect mesh and inspect for caterpillars, aphids, flea beetles and slugs. |
|
Pick |
Take healthy outer leaves; preserve the growing tip and a leafy crown. |
|
Winter |
Frost-tolerant once established, but severe Hungarian weather can cause damage. |
|
Next season |
Usually flowers after winter. Raise fresh plants; seed saving requires isolation planning. |
|
HUNGARY IN ONE LINE Establish sturdy plants before autumn, keep them watered through summer, protect their leaves and enjoy regular cool-weather pickings; winter survival depends on local conditions. |
COME GROW WITH ME • BLACK PALM KALE
Kale and seed-saving guidance. Seasonal guidance is adapted for Hungarian home gardens.


